How to install Word 5.5 directly on DOSBox?
Introduction
In the last tutorial, we installed DOS 3.31 on DOSBox. We were unable to install Word 5.5 on it due to several problems as discussed in that tutorial. So, in this tutorial we are going to install Word 5.5 directly on DOSBox. We are able to do so because DOSBox emulates its own version of DOS by default.
The Microsoft Word word processor was first introduced for MS-DOS in 1983. Its design made use of a mouse and WYSIWYG graphics. Its crude WYSIWYG/mouse support was a direct response to the Apple Lisa/Mac, and VisiCorp Visi On. Initially it competed against many popular word processors such as WordStar, Multimate, and WordPerfect. Word for DOS was never really successful.
The DOS, Mac, and Windows versions are quite different from each other, and each restarted their version numbering at "1.0". Later versions are bundled with Microsoft Office.
Files Needed
Installing Word
Create a text document called word55.conf in the same folder as the hard disk image. Copy the following text to that file -
Add the following lines to the end of the file -
mount c "F:\Legacy OS\DOSBox VMs\Word 5.5"
Save and close that file.
Open 'C:\Program Files(x86)\DOSBox' in File Explorer. Right click on DOSBox.exe and select 'Send to > Desktop (create shortcut)'.
Now, on desktop, right click the shortcut and click on properties.
In Target field, delete everything and type -
"C:\Program Files (x86)\DOSBox-0.74-3\DOSBox.exe" -conf "F:\Legacy OS\DOSBox VMs\Word 5.5\word55.conf"
Replace the paths as per your setup.
Click on Ok. Now rename the file to Word 5.5 or anything you want.
You can also move the shortcut anywhere on your computer. I like to keep the shortcut in the same place as the hard disk image and other config file.
Now, simply double click the shortcut to start DOSBox.
Then type the following and press enter.
mount a "F:\Legacy OS\Setup\Word 5.5"
Replace "F:\Legacy OS\Setup\Word 5.5" with the path where you extracted the downloaded archive.
Type a: and press enter. Then type a:\setup and press enter.
Press enter.
Press enter again.
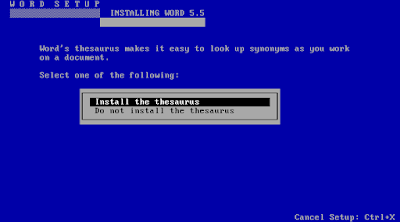
Select the options selected in the following pictures and press enter: -
At this stage choose the option that is applicable to you: -
You will be not prompted to replace any other disk during the installation..
Press enter.
Type WORD and press enter to open word.
To exit word, click on File> Exit.
If you start the VM again, type c: then enter then 'cd WORD' then enter.
Then type word and press enter to start word.
Conclusion
Please share this tutorial as much as you can.


Comments
Post a Comment